In our previous two articles, we made the mechanical adjustments necessary for our cabin and baggage doors to close properly. The next step is to get these doors to seal correctly. Unlike automobile doors, sealing systems for aircraft doors are minimal at best, and the process of installing new seals has always been a challenge: how to get the doors to close easily as well as seal completely. This article will cover the installation, maintenance and adjustment of the main cabin door seal. In subsequent articles, I will address baggage door seals and opening window seals. Each type of seal comes with its unique issues. Again, I will share the tricks we’ve learned over almost 40 years of working on Beech aircraft to help get these doors and windows as water- and air-tight as possible.
Beech uses a two-seal system to control air and water leaks for their cabin and baggage doors. The black rubber seals are designed to keep water leaks under control, and the leather or vinyl covered ¾”diameter inner seal (or windlace cord) is designed to control air leaks. Many owners have replaced a rubber door seal in the hope of eliminating an air leak only to discover that the problem was a worn or maladjusted windlace cord. In this article, we will deal with the rubber seals used for water leak prevention, beginning with the main cabin door. Here at Air Mod, we have had the best luck installing the original tear drop shaped rubber seal, part #115155-12000. We’ve tried many after-market seals and prefer the original. That said, a seal is only as good as the installation. Following is a step-by-step description of the process we use to remove, prep and install a new door seal.
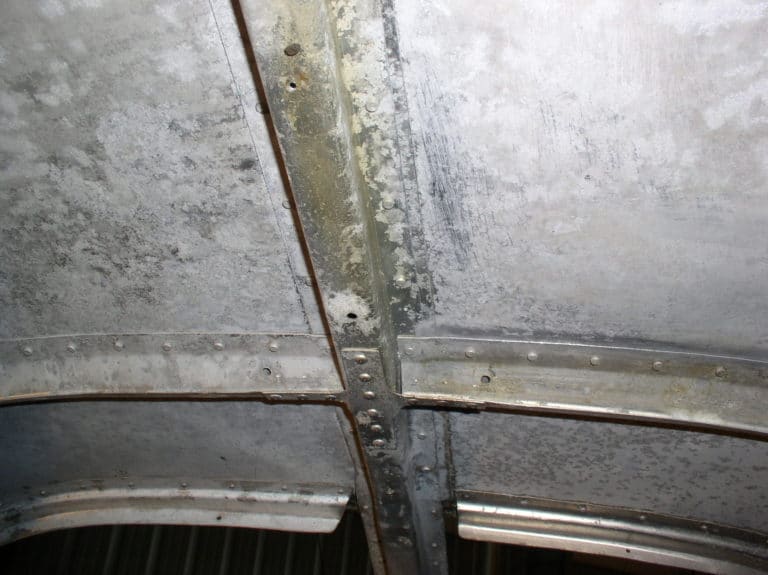
The first step is to remove the old seal and all of the old glue. Removing the glue is absolutely essential in getting the new seal to bond properly to the door. We use two methods to accomplish this often tedious task. If there isn’t too much glue build-up on the door, we’ll use mineral spirits or enamel paint thinner to soften and remove the old glue. The trick lies in repetitive application of the solvent using a 1” paint brush. Allow the solvent to soak in for about 15 minutes. If the glue hasn’t become soft after the first application, repeat the process until the glue is soft enough to be scraped off with a plastic or wooden scraper. We use paint stirring sticks that we sharpen on a belt sander; they work great and don’t damage the aluminum door.
Your door may have years of thick, hard glue build-up caused by multiple efforts to re-attach a seal or the installation of a new seal without removing old glue. If this is the case, a rotary wire brush and electric drill must be used to remove existing glue.
There are three important considerations to take into account if using this method.
One: If there are more than two layers of old glue, don’t bother trying the solvent removal method first. In fact, it’s important not to apply solvent to the old glue. The glue is hard, and applying solvent will only partially soften it, making it very difficult to remove with the wire brush. The heat created by the friction of the wire brush will soften the glue, turning the whole affair into a gooey mess. If you have any doubt at all about the potential success of the solvent method, I would go directly to the rotary wire brush procedure. We often test a small spot on the old glue and decide accordingly.
Two: Use a medium weight stainless steel wire brush with about 4” in diameter. Never use a plain steel brush as it will leave micro-particles of steel embedded in the surface of the aluminum door that can later cause the aluminum to corrode.
Three: Don’t try to remove all the glue in one pass. Keep moving the rotary brush, allowing the glue to stay cool, and removing it in layers. When the glue is down to a thin coat, it’s time to get a little more aggressive and apply more pressure to remove the last of it. We use a reversible drill. By occasionally reversing the drill, you will help to prevent the bristles of the wire brush from lying over and the brush will more efficiently remove the old glue. Don’t use too much pressure, as hard stainless bristles can damage soft aluminum. Be patient – you will get the job done! A final wipe with solvent is all that will be needed to make the door ready for a new seal and glue.
Now that the hard part is done, it’s time to apply contact adhesive to both the clean door and the new door seal. I know that the last thing most of us like to do is read instructions, but please read the label on the can or tube of adhesive. Contact cements are very temperature and humidity sensitive. A few minutes of reading can save hours of re-work.
There are several contact adhesives that do a great job of bonding these rubber seals to the doors, many available at automotive parts stores. Follow the instructions and you’ll have good results. A couple to try are 3M 8046 top and trim adhesive and DAP Weldwood contact adhesive. These products are applied to both the aluminum door and the new seal. One good coat per surface is all that is needed. After a prescribed cure time, the seal is ready to be bonded to the door. One important but often omitted step is to clean the rubber seal before applying the layer of contact adhesive. The new seal comes from the factory with a thin coat of a powder-like lubricant on it. We use lacquer thinner and a soft rag to remove all traces of this substance prior to applying the adhesive.
Positioning and bonding the seal will require the help of a second person. With one person holding the seal, the other applies it to the door, beginning at the upper door hinge working clockwise. You should know that this type of adhesive bonds instantly, so locate the seal accurately before pressing it down. The sketch shows where to locate the seal. Remember the round end faces out. We often get a Bonanza or Baron in with a seal on backwards.

At the top of the door, the seal must go around a fairly tight radius, so we make a very conscious effort to not stretch the seal in these areas. We actually lightly push the new seal back on itself as we bond it down. This technique ensures that the seal is slightly compressed, allowing it to stand up as much as possible so it can seal against the door jamb when the door is fully latched.
Another tricky spot is the lower forward corner of the door. Here the seal must go around a 90° corner and end abruptly at the lower hinge. We make a 90° V-cut from the pointed edge of the seal about three-fourths of the way in, stopping short of the round edge. The photo shows it all. It’s important to get a good fit between the seal where it meets the door hinges; any gap can mean a water leak. Beech supplies a thin rectangular rubber strip to apply between the door hinges. This must also be applied to a clean surface with contact adhesive.

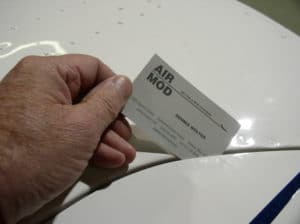
Once the new seal is installed, it’s time to check your handiwork. One way we verify that there are no gaps between the new seal and the door jamb is to close and latch the door and determine if we can freely slide a business card between the jamb and the seal. One should feel a noticeable resistance as you slowly slide the card around the door. No resistance means no seal. We mark the spots of no resistance, remove the seal at those places, apply new adhesive, and reposition the seal until we obtain the desired resistance.
The final leak test will be with a garden hose. With the nozzle removed, start at the bottom and work your way up. Mark any leaks with tape and reposition the seal as necessary.

We still need to address door hinge seals and the adjustment of windlace cords, but those seems like good topics for the next article. Until then, fly safe!